Thursday, November 30, 2017

Monthly Make It Challenge @ KKS

Hello All!
I want to share my card I designed for the Monthly Make It challenge at Kraftin' Kimmie Stamps... I just love this stamp....

Evangeline Angel
I started by stamping this image on Xpress-it paper and then coloring her up with Copic Markers.  Next I created my own background paper by using black embossing powder and a music sheet stamp, then I aged the paper with Tim Holtz Oxide Inks.  I chose a blue card base, added the background paper and the colored image on top.  Lastly, I added a little bow to bling it up a bit.

Here is the Kraftin' Kimmie Stamps set I used:


Isn't she so cute?!  I love her, I hope you do too!!  If you'd like to get her, just click on the name above the stamp image and it will take you to the shop.

Thanks for stopping by!
Sandy "Copic Diva" Le Doux


Summer BBQ & Dachshund Party

Hello.... 
Today I have a few card designs to share with you... 
Hope you enjoy them as much as I did creating them :)

First:  Happy Birthday Dad
I started by printing the images (table/condiments were printed in color).  Next I colored the BBQ King with Copic markers.  I chose a red card base and assembled the colored images on top, the BBQ King was popped up with dimensionals (from Stampin Up).

I used the following Imagine That Digistamp sets: 

Summer BBQ Kit                                       Farmer John
  

Second:  Doggone it!
I started by printing the image/sentiment in color.  I chose a yellow card base and then created a background with Tim Holtz Oxide inks.  I matted the colored image on blue card stock and assembled it all together.

Here is the Imagine That Digistamp set I used:


If you'd like to get any of the digistamp sets I used, just click on the name above the digistamp image and it will take you to the shop.
Thanks for stopping by!
Sandy "Copic Diva" Le Doux

Thursday, November 2, 2017

Hi There! & Happy Fall

Hello....
I have a few cards to share with you today... 

First - Hi There!
I started by printing the image/sentiment on Xpress-it paper and coloring it up with Copic Markers.  I chose a yellow card base and then added a background made with Tim Holtz Oxide inks.  I added the colored image on top to complete the card.

Here are the Imagine That Digistamp sets I used:

Bedtime Monique                                      Otter Say Hello
      

Second - Happy Fall
I printed the image on Xpress-it paper and colored it with Copic Markers.  I chose a yellow card base, added a background made with Oxide inks and a splash of black acrylic paint and then added a strip of orange/black patterned paper.  Lastly, I added the colored image on top.  (I will probably add a sentiment later when I am ready to use this card but for now I wanted to leave that option open)

Here is the Imagine That Digistamp set I used:


If you'd like to purchase any of these digistamp sets, just click on the name above the image and it will take you to the shop.  Also, don't forget to check out the freebies section :)
Thank you so much for stopping by!
Sandy "Copic Diva" Le Doux

Thursday, October 5, 2017

Love Bears & Marleen's Chocolate Bar

Welcome to my Happy Place!
Today I have a couple cards to share with you...

First up is "Love Bears"
I started this design by printing the image/sentiment on Xpress-it paper and coloring it with Copic Markers.  Then I chose a turquoise card base, added the colored image and then some bling to fancy it up.

Here are the Imagine That Digistamp sets I used:

                         Love Bears                            Freda's Flower Basket (sentiment)
  

Second is "Marleen's Chocolate Bar"
I started by printing Marleen on Xpress-it paper, coloring her with Copic Markers and then fussy cutting her out.  Then I chose a  peach card base, added a zebra patterned paper, mounted the image on a white stitched die cut and assembled them all together.  Lastly, I printed the colored cookie jar, fussy cut it out as well, added it to the top of the card with pop dots and then added a small metal sentiment.

Here are the Imagine That Digistamp sets I used:

Marleen's Chocolate Bar                                 Jars of Cheer
    

I just love playing with my Imagine That Digistamp sets... so many possibilities and an enormous amount of cuteness :)  If you'd like to play with any of these sets, just click on the name above the digistamp image and it will take you to the shop.  Don't forget to check out the freebie section for a few additional images to play with as well.

Thanks so much for stopping by... come again soon!
Sandy "Copic Diva" Le Doux

Thursday, September 28, 2017

Pinwheel Crab & Jars of Cheer

Hello Y'all :)
I have a few cards to share with you today... 

"Birthday"
I started by choosing a blue card base and adding a light blue patterned paper.  Then, I printed this colored image/sentiment and added bow stickers and a glasses w/mustache sticker... isn't that funny?! I still giggle when I look at it :)

Here is the Imagine That Digistamp set I used:


"Jars of Cheer" 
(front view)
I selected a yellow card base and added a blue patterned paper.  Then, I printed the colored images/sentiments and fussy cut them out.  Lastly I added some blue dots to bling it up a bit.

(Close-up view)
I put the bottom jar directly on the patterned paper, popped up the second jar (top one) and then doubled up the pop dots for the third jar (middle one).

Here is the Imagine That Digistamp set I used:


If you'd like to get either (or both) of these sets, just click on the name above the digistamp set image and it will take you to the shop.

Thanks for stopping by!
Sandy "Copic Diva" Le Doux

Tuesday, September 26, 2017

Elle's Release 9/26 & 9/27

Hello!
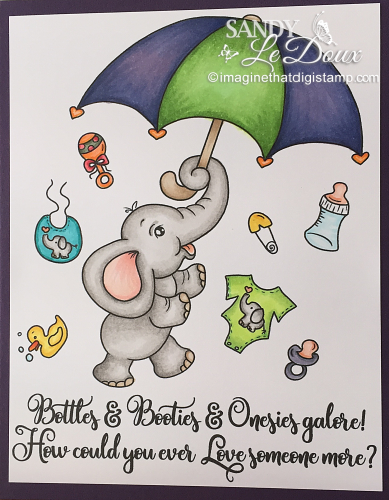
Did you know there is a new release with Elephants at Imagine That Digistamp?  There are 6 sets in all!  I have made some cards using each of the 6 sets, I'm so excited as I requested the Mummy Elephant for my daughters baby shower invitations and I just love, love, love what Kristy Breach designed!  My daughter loves it too so we will be using it for her baby shower invitations :)
Here we go.... I hope you love them as much as I do....

"Ellie's Flower Costume"
I printed the image/sentiment on Xpress-it paper and colored it with Copic Markers.  I chose a yellow card base, added a background created with Tim Holtz Oxide Inks and a stencil and added the colored image to complete the design.

Here is the Imagine That Digistamp set I used:


I printed the image/sentiment on Xpress-it paper and colored it with Copic Markers.  I chose an orange card base, added a patterned paper, the colored image and a few glitter dots to bling it up.

I printed the image/sentiment on Xpress-it paper and colored it with Copic Markers.  I chose a green card base, added a patterned paper,  and then the colored image to complete the card.

Here is the Imagine That Digistamp I used:


I printed the image/sentiments on Xpress-it paper and colored them with Copic Markers.  I chose a brown card base, added the colored image and a little wooden heart to finish it up.

I printed the image/sentiments on Xpress-it paper and colored it up with Copic Markers.  I chose a blue card base, added a background created with Oxide inks and added a strip of patterned baby paper.  Lastly, I added the colored image and a yellow flower to bling it up.

Here is the Imagine That Digistamp I used:


I printed the image/sentiment on Xpress-it paper and colored it with Copic Markers.  I chose a red card base, added a black & white striped patterned paper and then the colored image on top.  Lastly, I added a bling star to complete the card.

Here is the Imagine That Digistamp I used:


I printed the image/sentiment on Xpress-it paper and colored it with Copic Markers. I chose a purple card base and added the colored image on top.

Here is the Imagine That Digistamp I used:


I printed the image/sentiment on Xpress-it paper and colored it with Copic Markers.  I chose a blue card base, added patterned baby paper and then the colored image on top.  Lastly, I added some little wooden hearts to bling it up a bit.

Here is the Imagine That Digistamp I used:


Aren't these Ellie images so adorable?!!  I love them so much... if you would like to get these images, just click on the name of the image just above the digistamp set image or visit the shop HERE.  
And don't forget that you can totally use my coupon code listed below....

Thanks so much for stopping by!!!
Sandy "Copic Diva" Le Doux


Thursday, September 21, 2017

Ice Cream Maddy & Party Animals

Hello!
Hope you are having a great day!  I have 2 cards to share with you... both were designed using Imagine That Digistamp sets.  Here we go....

First, "Just for you!"
I started by printing the image/sentiment on Xpress-it paper and coloring it up with Copic Markers.  I chose a peach card base, added summer designed paper, then I matted the image/sentiment with a blue-ish patterned paper.  Lastly, I assembled it all together :)

Here are the Imagine That Digistamp Sets I used:

                   Ice Cream Maddy                   Acorn Bunny & Squirrel (sentiment)

Second, "Party Animals"
I started by printing the image on Xpress-it paper, coloring it with Copic Markers and fussy cutting it out.  I chose a purple card base, added a background made with Oxide Inks & a stencil and then a strip of brown glitter paper.  Lastly, I popped up the image and added some Nuvo drops.

Here is the Imagine That Digistamp set I used:


So much fun!!  If you'd like to play with these digistamp sets, just click on the name above the digitstamp set image or visit the shop HERE.  There are several images on sale right now and a FREEBIE section you won't want to miss. 
And just to help out, I have this coupon for my friends and blog visitors for 15% off every order of $5 or more... see the code below :)


Thanks for stopping by!
Sandy "Copic Diva" Le Doux